Your Guide To Bleeding Shimano Brakes On A Mountain Bike Or Road Bike
It's essential to do the proper maintenance of your bike from time to time. That helps you avoid bike replacements for a while and assures you have a safe ride on your bike. If you are riding your bike and have trouble with your brakes when you press the brake lever, then it may be a sign that you need to bleed your brakes.
Brake bleeding is uncommon, so many get intimidated by it. Some watch a YouTube video that explains how to bleed a brake or clean a lever. Yet, not all guides are easy to understand, especially if you are a beginner in the bike world.
After riding your bike for awhile, air can get into the brake system. That air causes your bike to have trouble slowing down or braking. Having any kind of trouble when you need to stop your bicycle is highly dangerous since it can make you crash onto something or fall from your bike when the lever stops working.
Hydraulic brakes need brake bleeding services when air gets into them. You can do the brake bleed process yourself, so don't worry about that. As said before, many guides use technical language that not everyone can understand. Read this page if you want a better translation on how to bleed Shimano brakes!
Looking for more maintenance tips? Check out the articles below:
Why Shimano?
With so many brake brands on the market, you may ask yourself: Why go for Shimano brakes? The answer is that Shimano brakes and caliper are the easiest to manage and maintain among all brake brands. Apart from that, these are the most popular on the market, so you can find the tools and spare parts more easily.
Many people think that the brake system consists only of the brake lever and the caliper. However, Shimano hydraulic disc brakes, and any disc brake in general, has a more complex system that you need to keep an eye on to prevent any trouble from happening.
What Tools Do I Need to Bleed Shimano Brakes?
Before learning how to bleed your Shimano hydraulic disc brakes and caliper, you need to get some tools. Those tools are essential to bleed a brake hydraulic disc, so make sure to get all of them before doing anything.
You can find most of those tools at a store that sells Shimano products. Those include:
- A syringe.
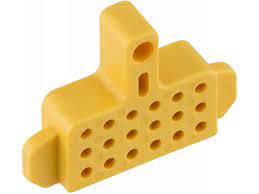
- Shimano bleed brake block.
- 2.55mm, 3mm, 4mm, and 5mm Allen wrenches.
- Shimano Hydraulic Mineral Oil.
- Shimano bleed kit.
- Shimano bleed funnel.
- Isopropyl alcohol.
Regardless of that, some people have ways of bleeding a Shimano brake that require other tools. For example, many people avoid using a syringe because it may introduce air bubbles in the Shimano brake system and produce issues with the brake lever and caliper. However, if you follow the process explained in this guide, you can use the syringe without the risk of that happening.
How Can I Bleed a Shimano Brake?
As we mentioned before, there are different ways of bleeding a Shimano brake. Yet, this is the most effective method to do it. Many people get scared when they need to bleed their brakes. Yet, it's better to do it than having issues when you have your hands in the brake lever and brakes don't function.
Bleeding a brake is easier than it seems, so don't worry about it. The process you have to follow to bleed your rear Shimano disc brakes is the same you have to do with the front brake. Considering that, in this guide, we use the rear brakes as an example. You only have to repeat the process when bleeding the front brakes and caliper.
That being said, here is what you have to do to bleed your Shimano disc brakes:
Put your Bike in a Work Stand
You have to place your bike in a bike stand to bleed its brakes and caliper. That's because, if it's in riding position, it can be more difficult for you to take out all the bike parts you need to remove and the mineral oil or DOT brake fluid can fall on the ground. Apart from that, you also need your lever in the right position.
Brake bleed services and other maintenance processes need you to place your bike on a work stand and move the lever. Getting one can be an excellent investment in the long run.
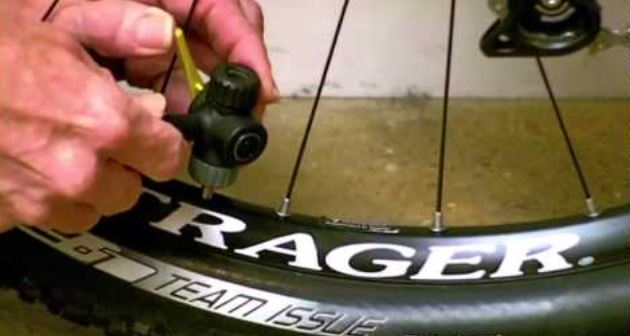
Take Out the Wheel
You need to take out the rear wheel to get to the brake pads and the caliper pistons. Taking out the brake pads is fundamental to advance in the brake bleed process, so make sure to do it correctly. Putting things such as your wheel or lever back is easy, so don't worry about that matter.
Remove the Brake Pads
Shimano brake pads are held together by a cotter pin, a bolt, or even a zip tie. That means you need a different tool to remove the brake pads depending on which one it is. You can remove cotter pins with your hands or pliers. However, you may need a 3 mm Allen wrench to remove a bolt.
Cotter pins and bolts are used to secure your brake pads when you squeeze the lever, so getting them out allows you to take out the brake pads.
Install the Bleed Block
Once you've done that, you have to install the bleed block into the brake caliper. That process is done with the cotter pin or bolt of your bike. Doing that prevents the caliper pistons from coming out when you start bleeding your Shimano hydraulic disc brakes.
Level the Brake Lever
Before starting the brake bleed process, adjust the brake lever to a safe position. Make sure the brake lever is level so air bubbles go to the top instead of somewhere else in the brake system. When air bubbles go to the top, you can get rid of them easily by squeezing the lever, so they must rise there.
Take Out the Bleed Fitting Screw
The bleed fitting screw is also known as the bleed port screw. That bleed port screw is on the top of the lever reservoir, and you can take it out with a 2.5 mm Allen wrench. Doing it allows you to also remove the small O ring. The cap may come out after you take out the rubber O ring or the bleed port screw, so don't get scared if that happens.
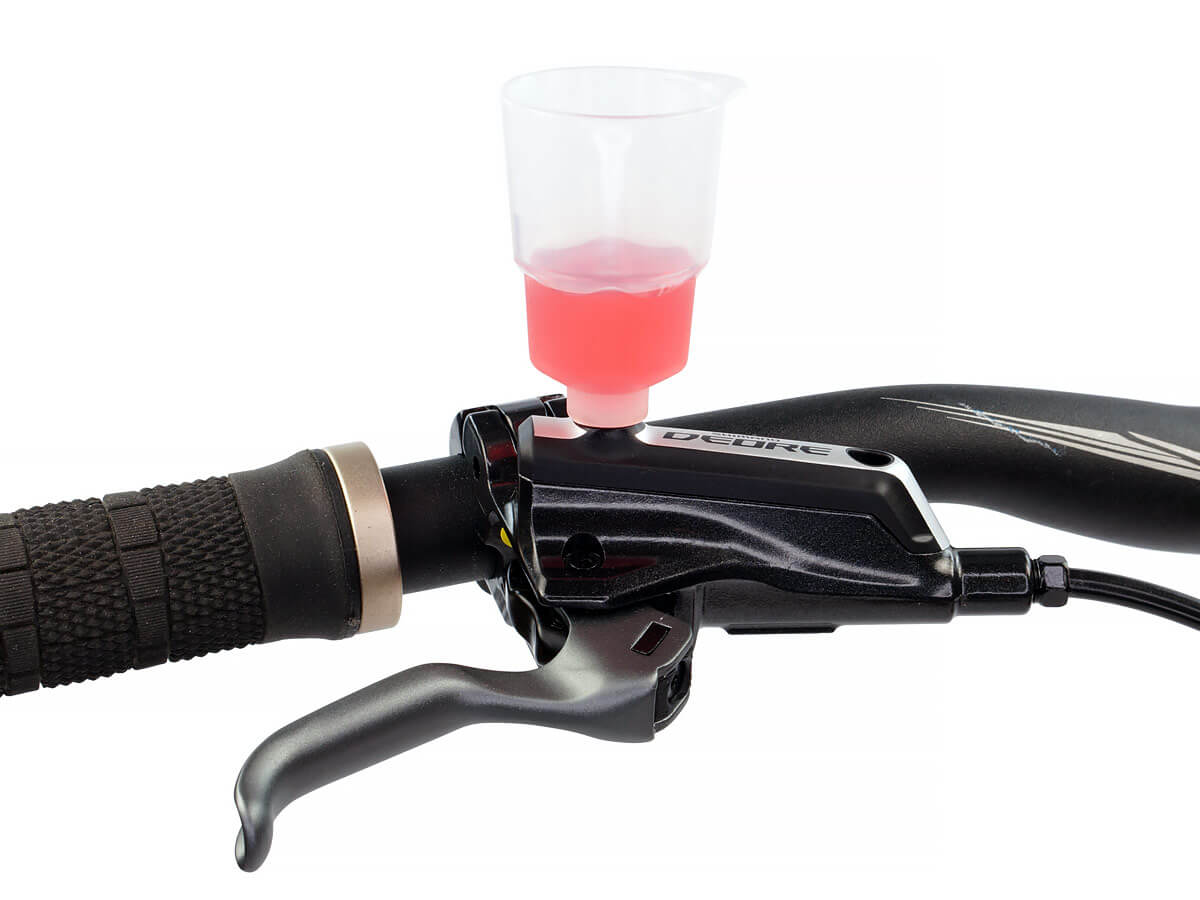
Introduce the Shimano Bleed Cup
Carefully thread the Shimano bleed cup into the bleed port. Try to not make any mistake while doing this since it can make you spill the DOT fluid later in the process. Regardless of that, leave the plunger in.
Fill the Syringe with the Mineral Oil
Now that you've gotten into the real Shimano brake bleed process, fill the syringe with Shimano Hydraulic Mineral oil and then attach it to the bleed valve/ bleed nipple. Clean your syringe after doing that to avoid dirty fluid from getting into your brake system through the caliper bleed nipple.
The oil you use must be Shimano hydraulic mineral oil. There are other types of oil you can use, but not using the Shimano mineral oil can cause some issues with the brake lines.
After doing that, use the 7mm Allen wrench to take out the bleed fitting.
Push the Fluid into your Brake System
If you already attached your syringe to the bleed valve/bleed nipple, take out the plunger of the bleed cup to push fluid through the Shimano brake system. You can see if everything is working by checking the fluid in the bleed cup.
Remove the Syringe
Close the bleed fitting at the lever reservoir and take out the syringe from the bleed nipple. However, some fluid can splash out and fall into the ground when you take out the syringe. You can add a little suction to the syringe itself to keep the fluid from splashing.
Get Rid of Remaining Air Bubbles
As we mentioned before, some air bubbles in the fluid may rise to the top after you finished the bleeding process. However, you can remove them by squeezing the tire lever for a few minutes. That's one of the reasons you need to level your lever position in the first place. If you have trouble squeezing the brake lever bar clamp, you can loosen it with a 4 mm Allen wrench.
Remove the Bleed Cup
To do it, you have to take out the plunger first. After that, replace the bleed port screws at the lever and brake caliper sides. Make sure each bleed screw is clean.
Clean Everything
Some parts of your bicycle may have gotten dirty with brake fluid flow or oil in the Shimano brake bleeding process. Having a clean brake lever is important, so use alcohol to clean it, the brake caliper body, and the brake line. You can clean the lever and the caliper with a rag or paper towel.
Reinstall the Parts you Removed
The brake bleed process is now finished, so you have to put everything back to the way it was. Install brake pads with the cotter pin or bolt to make them contact the rotor with no trouble. After doing that, reattach the wheel to the bike. Repeat that process for the front brakes. After doing that, you are ready to ride your bike with no risk of the lever malfunctioning.
Conclusion
As you could see, it's not that difficult to bleed Shimano disc brakes when air gets into them. Doing it yourself can save you a lot of money from maintenance services. Take this page as an easy reference of how to do it.
The most important thing while riding your bicycle is feeling safe, so keep your brake system functional at all times to avoid any kind of accident. Remember to bleed Shimano disc brakes often! Try to check if your lever works correctly before going on a ride.
Can bleed Shimano disc brakes with or without a bleed kit. But having the bleed kit on hand is more efficient since it has all the necessary tools for the Bleed procedure.